How to setup a local AWS SageMaker environment for PyTorch
As a hack data scientist but mostly-legit web developer, I’m frustrated with the process of creating an ML application (a simple UI to trigger predictions and a publicly accessible API). The flow for creating and iterating on a typical web application feels like driving down a low-traffic, gently curving country road on a spring day. The ML app dev flow? It’s like learning how to drive a car with a manual transmission.
Why is the ML application dev flow so rough? A big reason: there’s no emphasis on developing locally. I’ll illustrate.
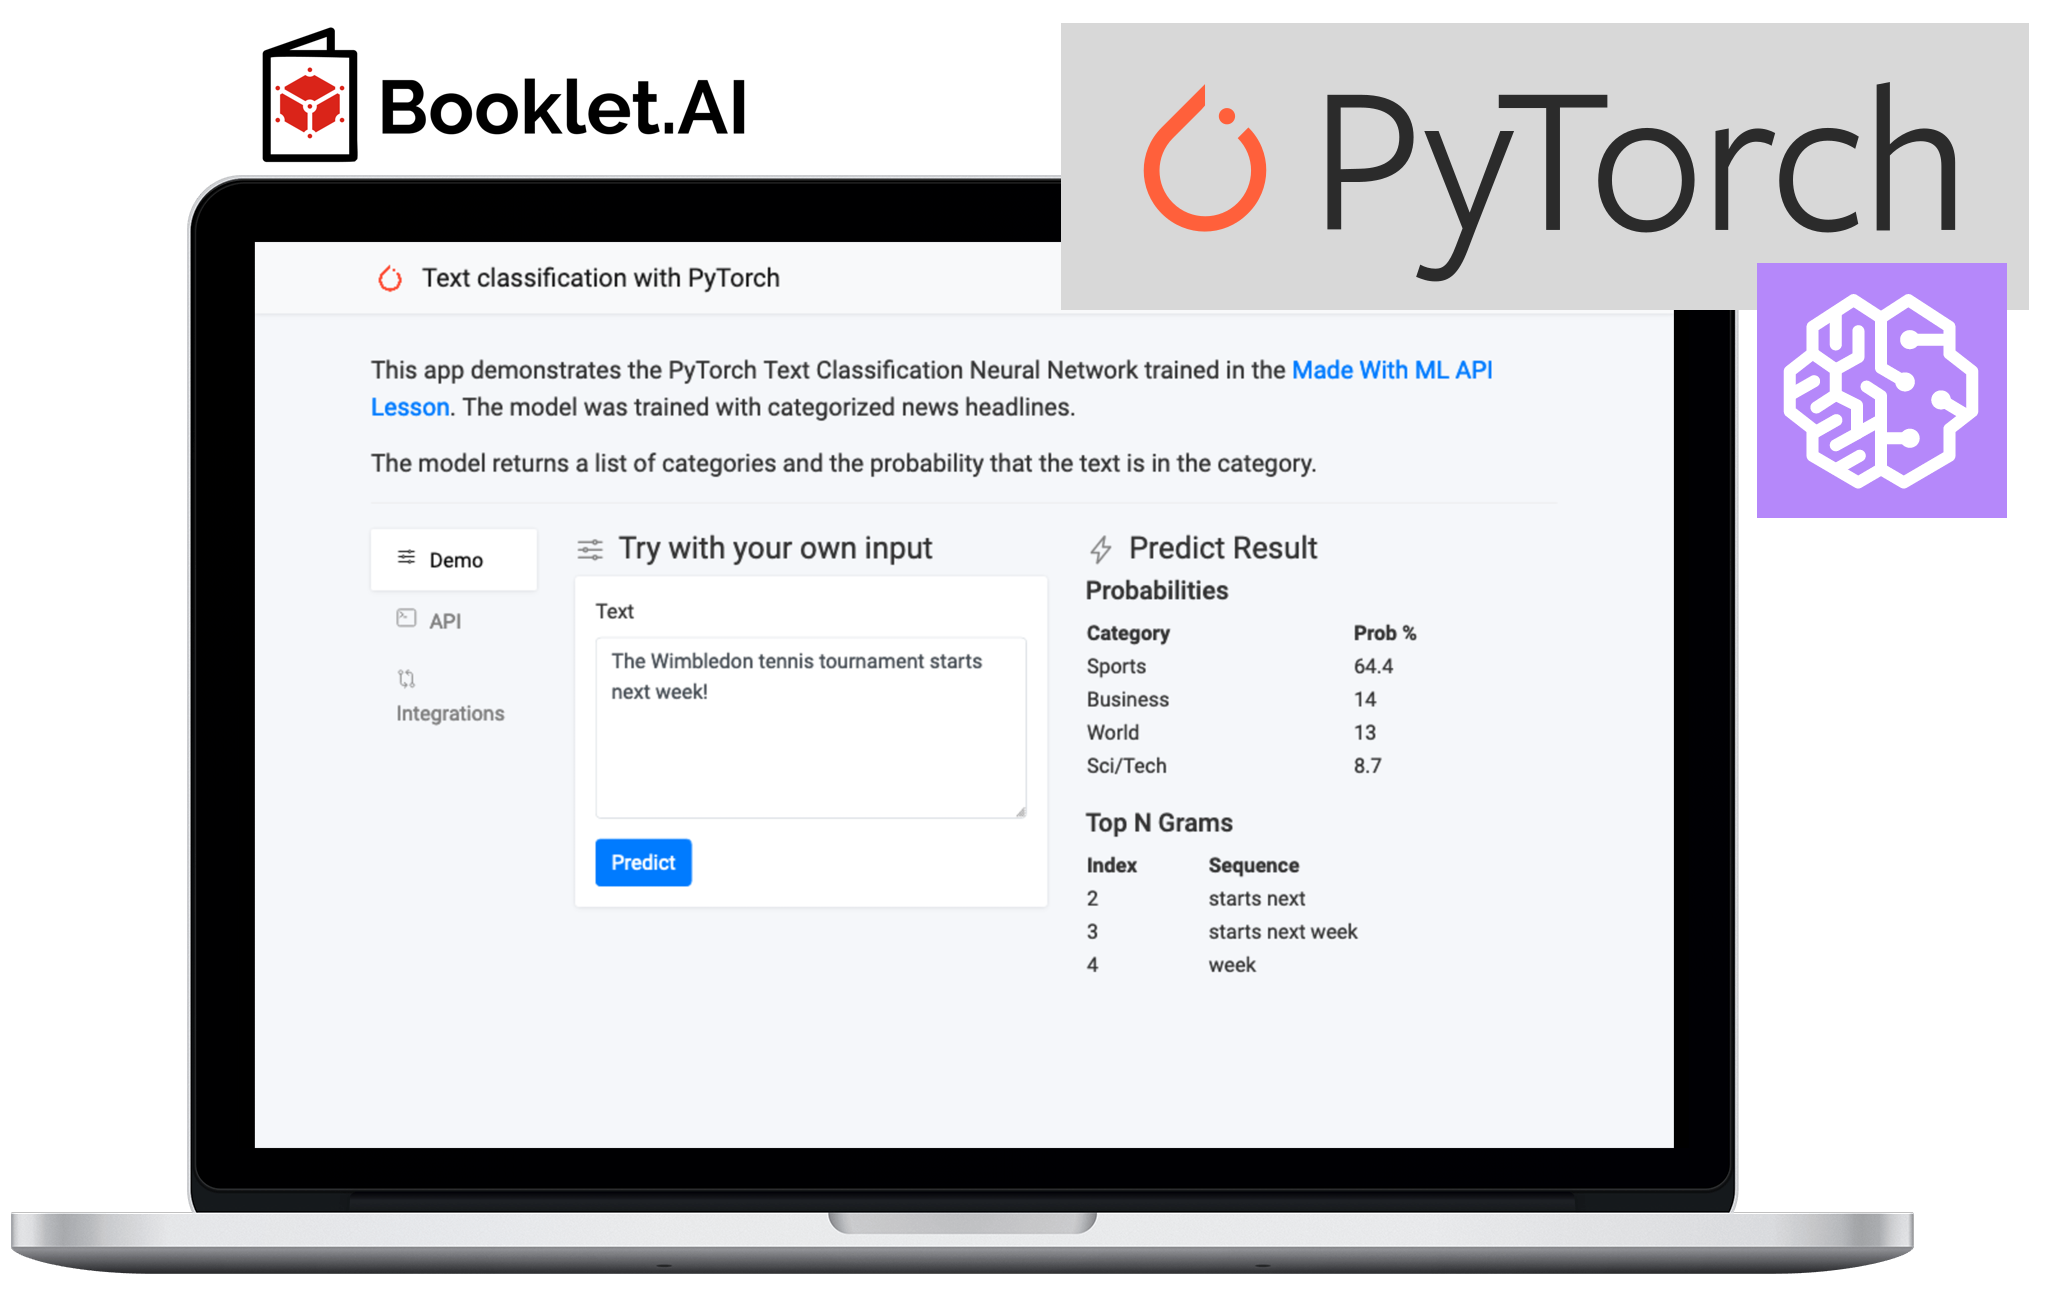
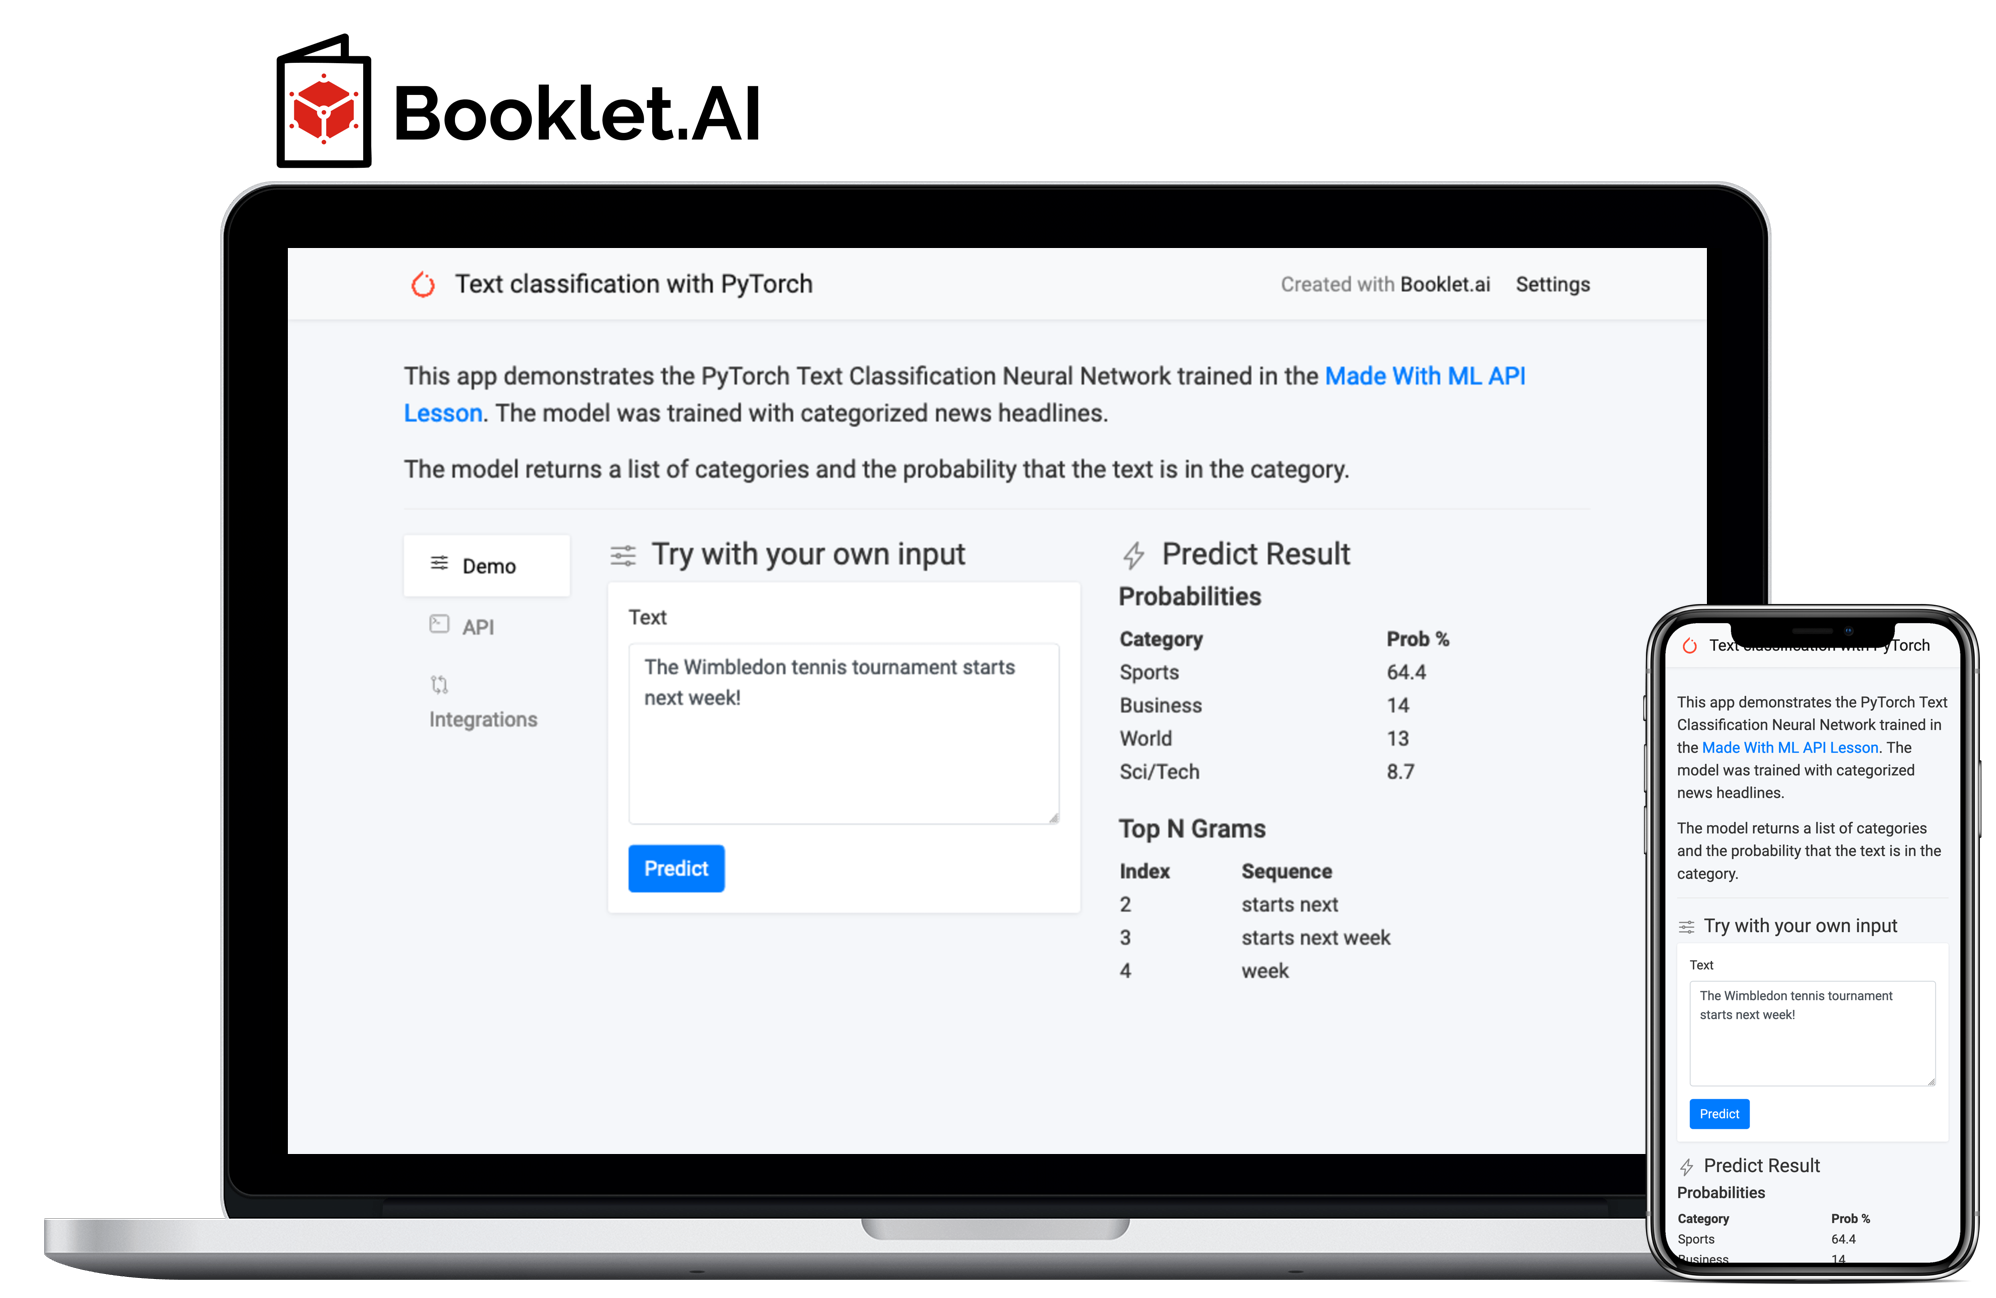
I'll show you how to create an ML App for a PyTorch Neural Network deployed to AWS Sagemaker. 🚀Try the ML web app on Booklet.ai.
So you want to deploy a PyTorch model to AWS Sagemaker?
You’ve built a model and now you want to deploy it. You stumble onto the AWS Sagemaker landing page and see this text:

One-click deployment? Integrate your new models into your application in minutes? You’re a data scientist, not a web developer - why spend your time learning web tech? This sounds great - sign up!
Next, you search for “Use PyTorch with Amazon SageMaker “ and stumble upon your use case:
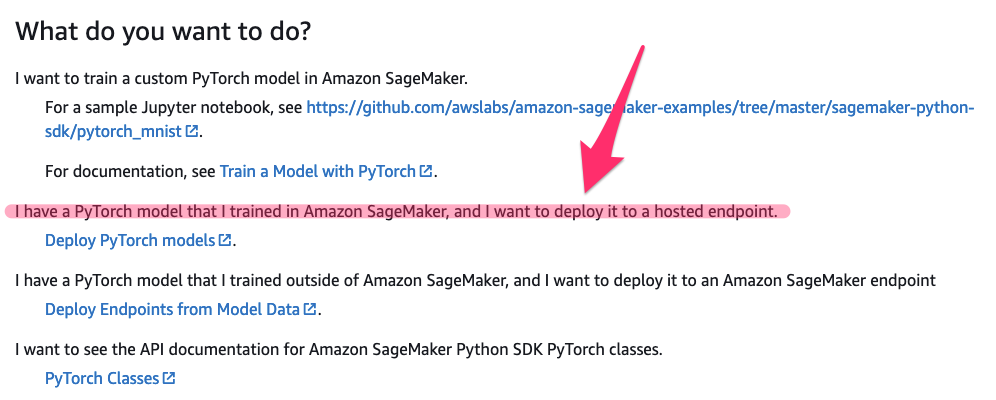
Perfect! You follow the link and land on Deploy Endpoints from model data in the SageMaker SDK docs. With just two function calls, you have a deployed model!
pytorch_model = PyTorchModel(model_data='s3://bucket/model.tar.gz', role='SageMaker Role',
                             entry_point='transform_script.py')

predictor = pytorch_model.deploy(instance_type='ml.c4.xlarge', initial_instance_count=1)
…but then the pain starts:
- What’s the
model_datafile format? You have a model file, but you also have some encoders that are needed in pre-processing. How do you load those? - What does the
entry_pointscript do? The “Deploy Endpoints from model data” section of the docs doesn’t describe this.
Oh well. You cross your fingers, run the code, deploy, and wait about ten minutes for the process to complete. Next, you find some code examples so you can call invoke_endpoint() and trigger a prediction. That fails and the CloudWatch logs mention a missing model_fn() function, so you find Load a Model in the docs. You take a shot at this and deploy.
…and wait 10 minutes. You call invoke_endpoint(). This time there’s an error in input_fn(), which seems to be related to pre-processing. You have strings in your raw input - does SageMaker not like that? Or are you sending a malformed payload in invoke_endpoint()?
You try something, deploy, and … wait … 10 … minutes.
Holy Hell. Why is this so hard! Well, I write crappy code that doesn’t work. That’s not a problem when I’m training my PyTorch model in a notebook because I can quickly fix my mistakes. Deploying to SageMaker is a different story - every little change requires a long wait.
You need a local SageMaker environment
When you’re done with this post, those 10 minute waits on SageMaker deploys to verify new code works will be a relic of the past! You’ll have a local SageMaker development environment that runs on your computer. You’ll have a simple script to deploy changes to Sagemaker.
PyTorch + SageMaker Example
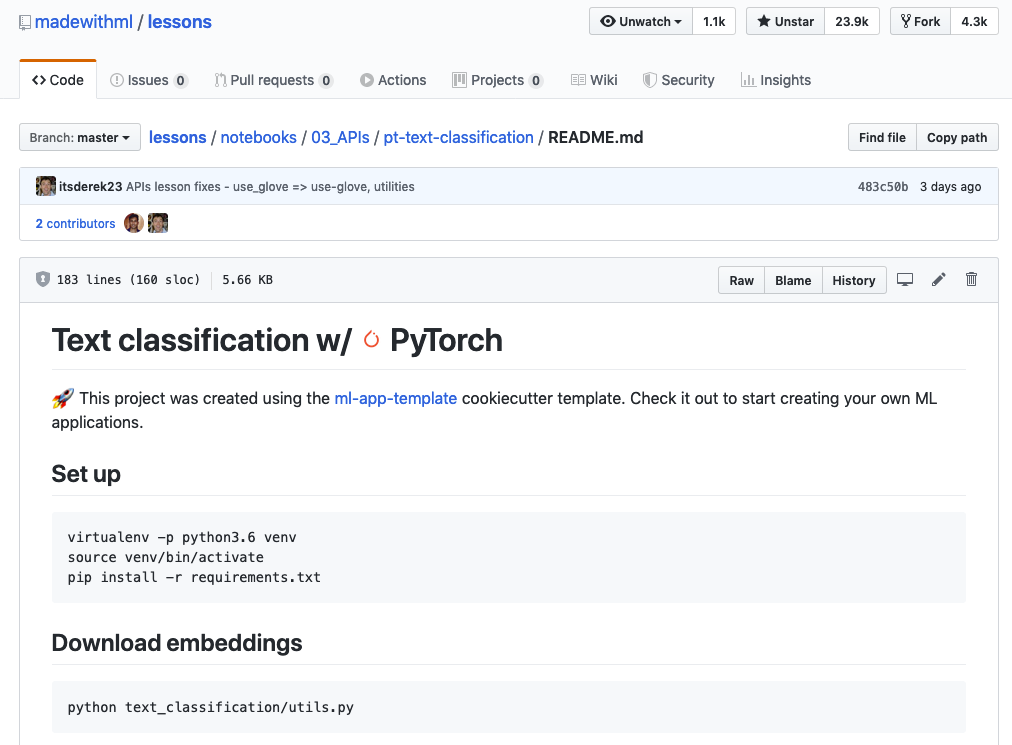
Our starting point is a PyTorch Text Classification Neural Network I’ve forked from the excellent Made With ML lessons GitHub repo. My fork adds a deploy/sagemaker directory that contains logic for deploying the model to a local + production SageMaker environment.
This lesson is also a great starting point as it shows how to create a RESTful API for the model with FastAPI. You can see the difference between rolling your own API with FastAPI or leveraging Sagemaker.
Prerequisites for running this tutorial
- GitHub Repo - clone my forked copy of the Made With ML Lessons repo with the SageMaker updates:
git clone https://github.com/itsderek23/lessons.git. - AmazonSageMakerFullAccess IAM Role - Create a role w/the AmazonSageMakerFullAccess policy.
- Project setup - Follow the setup instructions in the README.
- Train the PyTorch Model - Follow the instructions in the README.
The commands and files I reference assume the following current directory:
[REPO_DIRECTORY]/notebooks/03_APIs/pt-text-classification
How does Amazon SageMaker Local Mode work?
Besides some clues in an an intro blog post, I haven’t found a focused summary of how SageMaker Local Mode should be configured to serve a local ML model. The official AWS blog post is focused on training, not on hosting an already built PyTorch model. Here’s what I’ve pieced together.
SageMaker Local Mode requires three categories of changes:
- Pre-built Docker containers: use the same Docker container that SageMaker runs in the cloud when serving your PyTorch model. This gives you a high level of confidence that if your model works locally it will also work in production.
- Local versions of API clients: normally, you use
botocore.client.SageMakerandbotocore.client.SageMaker Runtimeclasses to use SageMaker from Python. To use SageMaker locally, we’ll usesagemaker.local.LocalSagemakerClient()andsagemaker.local.LocalSagemakerRuntimeClient()instead. - Function argument changes: we also change a couple of arguments to
PyTorchModel()andpytorch_model.deploy(). Those changes are below.
PyTorchModel() for Sagemaker Local
Load model_data from a local file. We don’t need to upload the model.tar.gz file and load it from an S3 bucket. This is much faster when testing new code.
pytorch_model.deploy() for Sagemaker Local
Set instance_type to local vs. a standard Sagemaker instance type (ex: ml.t2.medium).
To handle the differences between our local and production environments, I’ve created a DeployEnv class that loads environment-specific settings from deploy/sagemaker/config.yml.
Introducing the DeployEnv class
Since our local environment requires a scattered set of modifications, I’ve encapsulated the changes into a single DeployEnv class. This means we don’t have to pollute our scripts with if statements that check for local or prod environments.
Let’s see how DeployEnv works.
First, if an environment isn’t specified we default to the local environment. This is where you should be spending most of your time since development is faster here.
>>> from deploy_env import DeployEnv
>>> env = DeployEnv()
>>> env.current_env()
'local'
>>> env.isLocal()
True
Load production settings by setting the DEPLOY_ENV=production environment variable:
DEPLOY_ENV=production python
>>> env = DeployEnv()
>>> env.current_env()
'production'
>>> env.isProduction()
True
Load the correct SageMaker API client for your environment via DeployEnv.client() and DeployEnv.runtime_client().
The local environment SageMaker clients:
>>> env.client()
<sagemaker.local.local_session.LocalSagemakerClient object at 0x11816fe10>
>>> env.runtime_client()
<sagemaker.local.local_session.LocalSagemakerRuntimeClient object at 0x11929f1d0>
The production environment SageMaker clients:
DEPLOY_ENV=production python
>>> env.client()
<botocore.client.SageMaker  object at 0x1139a8190>
>>> env.runtime_client()
<botocore.client.SageMaker Runtime object at 0x1139eced0>
Access environment-specific settings via DeployEnv.setting(). These use deploy/sagemaker/config.yml as the underlying data store.
For example, model_data_path uses a local file in the local environment:
>>> env = DeployEnv()
>>> env.setting('model_data_path')
'file://build/model.tar.gz'
…and in production:
DEPLOY_ENV=production python
>>> env = DeployEnv()
>>> env.setting('model_data_path')
's3://madewithml/model.tar.gz'
Now that we can access environment-specific settings, it’s time to write our environment-agnostic deploy script.
SageMaker PyTorch Model Deploy Script
I’d like to deploy the PyTorch model to my local and production environments with the same script.
To deploy to the local environment:
python deploy/sagemaker/deploy.py

2020-04-02 09:10:32,755:INFO:deploy.py:deploy:38:
Deploying model_name=pytorch-text-classification to env=local
How long does it take to deploy locally? Well here’s the first and last log lines:
2020-04-02 09:10:32,755:INFO:deploy.py:deploy:38:
algo-1-0weqp_1  | 2020-04-02 15:10:55,487 [INFO ] W-9001-model-stdout com.amazonaws.ml.mms.wlm.WorkerLifeCycle - Connection accepted: /home/model-server/tmp/.mms.sock.9001.
23 seconds! Or, 26 times faster than deploying to the AWS SageMaker production environment. That makes iterating on your ML app a lot faster. Note that the first local deploy will take longer as SageMaker needs to download the PyTorch Docker image.
To deploy to the production environment:
DEPLOY_ENV=production python deploy/sagemaker/deploy.py
How does deploy/sagemaker/deploy.py handle both environments?
We’re just using the DeployEnv class from above. For example:
env = DeployEnv()

pytorch_model = PyTorchModel(
        model_data = env.setting('model_data_path'),
        name = env.setting('model_name'),
        framework_version = '1.4.0',
        role = env.setting("aws_role"),
        env = {"DEPLOY_ENV": env.current_env()},
        entry_point = 'deploy/sagemaker/serve.py')

predictor = pytorch_model.deploy(
        instance_type = env.setting('instance_type'),
        # Below isn't working: https://github.com/aws/sagemaker-python-sdk/issues/101#issuecomment-607376320
        update_endpoint = update_endpoint_if_exists(),
        initial_instance_count = 1)
Now, what is this deploy/sagemaker/serve.py file?
Loading and serving our PyTorch model in Sagemaker
The SageMaker PyTorch Model server lets us configure how the model is loaded and how it served (pre/post-processing and prediction flows). It can be a bit of work adapting this to fit an existing model (that’s what led to creating a local environment).
deploy/sagemaker/serve.py encapsulates the logic of loading and serving our text classification neural network model. Here’s how I adapted model_fn, input_fn, and predict_fn to fit the existing model.
model_fn
model_fn tells SageMaker how to load the model from disk. This function is required. My guess is that SageMaker creates a dedicated function for loading the model so that the model can be loaded only at startup and not on every API invocation. De-serializing a model from disk is slow.
However, in the interest of not refactoring the existing Predict class for this app, I made model_fn a null-op. Predict.predict() nicely encapsulates pre/post-processing, loading the model, and prediction. I’d prefer to just re-use this. If this was a heavily-used API, I would move the model loading to a dedicated call so it was only executed on startup.
Here’s the code:
def model_fn(model_dir):
    log.info("In model_fn(). DEPLOY_ENV=",os.environ.get("DEPLOY_ENV"))
input_fn
SageMaker uses a dedicated function, input_fn, to handle pre-processing data. There is a default function that deserializes a single JSON list. However, if you look closely, the docs mention the list is transformed into a torch.Tensor so this won’t work with list of string objects (which is what we have). This is because the default implementation calls torch.from_numpy() on our input. from_numpy doesn’t like strings.
Here’s the custom input_fn:
def input_fn(request_body, request_content_type):
    data = json.loads(request_body)
    model_input = [{"text": features[0]} for features in data]
    return model_input
IMPORTANT: I want to confirm to the default SageMaker PyTorch JSON format (a single JSON list) so that I can hook the model into Booklet.ai and get a web app UI + public API for free. Booklet.ai expects the API schema to match the defaults. Also, when I forgot the API schema a couple of days from now I’ll probably just go back to the SageMaker SDK docs. It’s nice to have a universal format.
predict_fn
Since Predict.predict() already does everything we need, we just need to call this in a custom predict_fn function. SageMarker provides a default predict function that basically executes model_fn().__call__(). However, I decided not to load the model in model_fn() for this POC.
def predict_fn(input_data, model):
    prediction = predict.predict(
        experiment_id='latest', inputs=input_data)
    return prediction
What’s the predict function return? There’s actually a predict.py script in the project we can execute to invoke the model from the command-line. We’ll have the same output:
python text_classification/predict.py \
>     --experiment-id 'latest' \
>     --text 'The Wimbledon tennis tournament starts next week!'

2020-04-02 10:13:51,262:INFO:predict.py:<module>:137:
[
    {
        "raw_input": "The Wimbledon tennis tournament starts next week!",
        "preprocessed_input": "the wimbledon tennis tournament starts next week",
        "probabilities": {
            "Sports": 0.6436089277267456,
            "Business": 0.13958673179149628,
            "World": 0.1301129013299942,
            "Sci/Tech": 0.08669137209653854
        },
        "top_n_grams": {
            "2": "starts next",
            "3": "starts next week",
            "4": "week"
        }
    }
]
output_fn
Rather than returning the key/values for raw_input and preprocessed_input, we’ll just return the model output. We can handle this processing in a dedicated output_fn function:
def output_fn(prediction, content_type):
    res = [{"probabilities": result["probabilities"], "top_n_grams": result["top_n_grams"]} for result in prediction]
    return encoder.encode(res, content_type)
Testing the PyTorch SageMaker endpoint
I wanted to make it easy to verify that the endpoint is working in both local and production environments. Introducing test.py.
The test.py script invokes the SageMaker endpoint with two inputs:
payload = [["The Wimbledon tennis tournament starts next week!"],["The Canadian President signed in the new federal law."]]

response = env.runtime_client().invoke_endpoint(
    EndpointName="madewithml",
    ContentType="application/json",
    Accept="application/json",
    Body=json.dumps(payload)
)
Here’s some output:
python deploy/sagemaker/test.py
Attempting to invoke model_name=pytorch-text-classification / env=local...
Response= {'Body': <urllib3.response.HTTPResponse object at 0x11229f650>, 'ContentType': 'application/json'}
[
    {
        "probabilities": {
            "Sports": 0.6323092579841614,
            "World": 0.14220108091831207,
            "Business": 0.12423517554998398,
            "Sci/Tech": 0.1012544259428978
        },
        "top_n_grams": {
            "2": "starts next",
            "3": "starts next week",
            "4": "starts next week"
        }
    },
    {
        "probabilities": {
            "World": 0.94681715965271,
            "Sci/Tech": 0.03721475601196289,
            "Business": 0.01433292031288147,
            "Sports": 0.0016351662343367934
        },
        "top_n_grams": {
            "2": "federal law",
            "3": "law",
            "4": "the canadian president signed"
        }
    }
]
Want to test your production endpoint? You guessed it! Just use DEPLOY_ENV=production:
DEPLOY_ENV=production python deploy/sagemaker/test.py
Reviewing our new SageMaker PyTorch development flow
Here’s a summary of how things work (see these scripts on GitHub):
- Environment-Specific settings - Place these in
deploy/sagemaker/config.yml - Deploy:
python deploy/sagemaker/deploy.py - Test:
python deploy/sagemaker/test.py - Loading and serving the model: See the functions defined in
deploy/sagemaker/serve.py.
By default, all scripts use the local environment. To use production, set the DEPLOY_ENV=production environment variable. For example, to deploy to production:
DEPLOY_ENV=production python deploy/sagemaker/deploy.py
What about the ML web app?
It’s great that we can invoke the model via the SageMaker SDK, but wouldn’t a web app that does the same be way cooler?
You could build a web app with Flask, React, Docker, etc. Or, you can can just integrate Booklet.ai with your AWS account. In fact, I’ve setup a web app for this PyTorch Text Classification Demo:
Already have access to Booklet.ai? Follow our SageMaker integration instructions. Don’t have access to Booklet.ai yet? Just enter your email below 👇:
Summary
By using SageMaker local mode, we’ve cut the time to view changes to our ML model app from 10 minutes to 23 seconds. We can easily deploy changes locally or to production. We’ve added a responsive web ui to use the model via Booklet.ai without having to build a custom Flask app. Our ML app dev flow is now a lot smoother!